Showing posts with label * HOLIDAYS - FALL. Show all posts

Wednesday, October 14, 2020

Halloween Decorating ~ Black and White Elegant Fun

The Decorated House :: Halloween Decorating with Black and White. Come see the funny crows all dressed up for the holiday, and get some more fun ideas for decorating Halloween in Black and White!

Those silly crows certainly enjoy a Halloween gathering. Give them a few minutes to roam freely and they are all dressed up with hats and collars, too. I think they are imitating the art of my little witch Izabella  decked out in a snazzy black hat!  For the entry table, I made a tall pumpkin topiary with white pumpkins and a more traditional orange one in the center. This way I can have some Fall color by leaving it as is when Halloween is done.

Elegant and fun Halloween Decorating in Black and White. Crows with hats, Annie Sloan Chalk Paint Pumpkin and Mercury Glass

On the mantel is another (faux - foam) pumpkin painted with Annie Sloan Chalk paint. Why? I just like the way the paint looks, it covers over orange very well, and I already had it on hand. Another crow with her party hat a few spiders, and a mercury glass gourd makes a fun arrangement. 

Decorating for Halloween in Black and White with Vintage, Milk Glass, Crows with Hats and more! from Donna ~ The Decorated House

A sister crow sits on top of a small rattan chest along with a beautiful antique vellum book and a sweet little plush velvet pumpkin with a paper clay stem. 

DIY Ideas in the post for you to try:


1. Painted foam pumpkins. Any good paint will work. You might have to use one with a primer in it to cover up the really strong orange ones. But if you have some Annie Sloan Chalk Paint, it works very well. 

2. Make some little hats and collars for your crows. Really simple to do, the hats are just a cone and a circle of black construction paper. Cut a hole in the center of the circle and attach to the cone. 

For a quick collar, you can use a cupcake paper liner or weave a wire through some vintage (or new) lace and make a circle out of it. Or you can use wired ribbon, cut off one side, and pull the wire on the other side to gather it into a circle to put around the neck. 

3. Make your own plush velvet pumpkins. 

And fill with your own style and imagination! 
 
See Y'All Soon~

Thursday, October 1, 2020

~ DIY : How to Make Velvet Pumpkins Plush & Pretty Fall Decorating - Tutorial

DIY Velvet Pumpkins Tutorial. The Decorated House . How to make these pretty and plush velvet pumpkins.

I think the lovely velvet pumpkins are still a wonderful
addition to our Fall decorating. The instructions that I posted a
while ago is still one of the easiest ones to make.
Although I have seen some highly embellished, and some
imported ones of China or wherever, to me to the simplest handcrafted ones
you can make yourself are still the nicest.
____________________________________________

 How to Make Plush and Pretty Velvet Pumpkins:

It's getting to be that time of year again! Here is an early Fall Project 
you can make now, and use through Thanksgiving. 
 
You can find so many tutorials for making these pretty velvet pumpkins, it didn't seem necessary to write another one in great detail with step by step pictures.  Pinterest has lots of examples for DIY pumpkins and they are mostly the same. I have a bit different way of making them and I'm going to share that with you along with some finished pictures of course!
 
It was tough finding velvet when I made these! I guess there just isn't much demand. The type of fabric the companies use who make these commercially, and sell for big bucks, is silk velvet. You can order it online, if you cannot find it in the store. But one of the fabric stores had a nice stretch velvet in cream, off-white which was mainly what I wanted anyway, and that is what I used.

DIY . How to make Pretty and Plush Velvet Pumpkins. Tutorial The Decorated House

Close up of Stem and Ruching Details.

Inside my pumpkin is one of those cheap dollar pumpkins. Those things are pretty ugly. They are easy to spot because they have  bulky seam running across them. Unless you decorate them in some way to cover it, they always look odd. However, used as the inside center  of my new velvet pumpkin they work great!

Here is my method of a less floppy pumpkin. But it is equally as plush!

1.  Start with a cheap faux pumpkin, and cut a circle from your fabric to cover the whole thing, plus some extra for the bulk that you are going to add. Remember you can always cut it smaller, but you can't make it bigger once it is cut.

2.  Some of the more expensive velvet pumpkins have plastic (doll making) pellets inside.  This is not my choice if there are kids or dogs around who might get them.

The best alternative that I found is to use beans instead. I used dried lentils and dried black beans. Both were equally good for this purpose. You can find large, very inexpensive bags of beans at both costco and bj's.

3.  Put your faux pumpkin in a plastic bag; I used a gallon size zip lock bag.  Then cut off the zip part of the bag,  and tape the folds of the edge of the bag up around the pumpkin to a more round shape so that the bag will lay more flatly against the pumpkin. But leave the bag open enough to put in the beans.

4.  Now fill up the between the plastic bag, and around the pumpkin, with the beans. Move them around so that you have a layer of beans all around the pumpkin.

Then tie up the plastic bag with a baggie tie around the pumpkin and the beans.

5. Take the circle of fabric, and sew a simple basting stick about 1/4 inch from the edge all the way around. Use a double thread so you when you pull, it will be less likely to break.

6. Gather the thread around the edge, making a sack or bag for the pumpkin. Leave it open enough so that the pumpkin will fit inside.

7.  Put the bean-bag-pumpkin inside the center, and continue pulling the gathering thread until it is closed and then sew it from side to side to close it tight. Now you will have a lovely ruching at the top which you can adjust after you tie off the thread.

8.  Now you can play with the beans and pinch the velvet and beans to make ribs.

9.  Hot glue, or regular glue, a real pumpkin stem on the velvet pumpkin. Be sure that has been thoroughly dried. (Do not store real pumpkin stems you collect and dry in a plastic bag unless they are very, very dry, or they will mildew.)

So now you can see that by doing your pumpkins this way they have a little different look. I like to make pretty ribs, and have them stay that way.

The stem is real, but I dry brushed some lime green on it instead of leaving it all brown. See the previous post for how to make a really pretty stem from air-dry clay.

The Decorated House :: How to make Pretty and Plush Velvet Pumpkins

You'll notice that my pumpkin is not floppy. It holds it shape exactly. If you want a floppy version, most of the tutorials I found make them so.  Some used polyester batting inside and nothing that holds the shape like the faux pumpkin and the beans. Those can be nice as well, it just  wasn't the look I was after.

See Y'All Soon~
Donna

Sunday, September 27, 2020

How to Add a Pretty DIY Stem to Your Velvet Pumpkins


Add a DIY Pumpkin Stem to your Velvet or Faux Pumpkins to make them extra special! The Decorated House

Velvet Pumpkin with Air-Dry Clay Stem

The velvet pumpkins are such a pretty addition to your Fall and Halloween décor. You can certainly have them out from September through Thanksgiving.  One of the nicest ways to finish them is by adding a real pumpkin stem which adds a touch of realism and rustic charm. You can save stems from your own pumpkins each year, or use ones you found at the market maybe.  It is so interesting to see how many different shapes the stems take on while growing.
  
Sometimes you might need a certain size or a more whimsical look than you might have saved. I had one pumpkin stem that was my favorite, but it was too large for this little velvet pumpkin. So I used the real stem as inspiration for making one the right size.. This one is made of  an air dry clay. It will say "air dry" on the package. Sometimes it might be paper clay, but there are other kinds as well. The one shown here is a paper clay type.  It is very easy to use, and you can keep it from drying out by when you store it for longer periods of time by  keeping a damp paper towel in a plastic bag with it.
 
********************************
*Start by rolling out a fat piece of clay the size that seems good for your size pumpkin.
*Adjust the size of the roll to be fatter at one end, and slimmer at the other.
*Make some lines down the sides with a knife or other slim object like a real pumpkin stems have.   
*Give it a nice twist, until you like the way the lines and curve looks to you.
*You can separate the bottom part like the one above.
*Let it dry completely.
*Paint your pretty stem with any acrylic or craft paints in the colors that make it look like a real   stem: browns,  green yellows, grays.

**********************************

(Of course you can use a clay that needs to be baked like Sculpey as well.)

Now you have no problem if you can't find just the right real stem for your pumpkins, just make your own.  Of course these work wonderfully on the foam faux pumpkins that are just perfect for painting.

See Y'all Soon~ 

Donna

Sunday, September 22, 2019

Fall Mantel ~ Celebrating Fall

The Decorated House . Fall Mantel. Donna Courtney

It never really feels like Autumn this time of year, but since the first day of the new season is Monday, it's time to celebrate the season just the same. People always say how Fall is their favorite season. I love it as well, but I don't play favorites. Everyday is a celebration of Life, no matter the season. 

This beautiful vase reminds me of an magic vessel that if you gently rub it, a genie might appear. 
So far none have answered the rub. There are so many art festivals this time of year, maybe you can find something handmade that  brings a some beauty to your home.

Wednesday, September 27, 2017

Celebrating Fall ~ Autumn : Decorating


Fall Decorating - The Decorated House

Fall is loved for its beautiful colors and it is just as wonderful to enjoy those same colors inside your home as well. You can use real and fresh leaves (as in the vase above) or dried magnolia leaves, with their rich color combination of copper and green for the perfect look and colors of Fall. If you use the preserved leaves, you can carry that element into the next season too. Almost everything in the vase is from nature - dried flowers, leaves and feathers along with only a few faux leaves here and there to fill it out. So depending on where you live, you might find everything you need for a pretty arrangement right outside your door!

Fall Autumn Decor - Magnolia Leaf Candle - The Decorated House


Previously I have shown you the magnolia leaf candle wrapped with the leaves all facing on the copper side, and also with the with the copper alternating with green. You gather from Nature and your garden to create a simple, or even more elaborate arrangement than this one. Here I used the candle in a white concrete garden container. It was filled with a floral foam so I could easily stick the leaves, berries and picks into it. It was covered with moss so you can't see the foam. The pumpkins can be painted with either flat white paint, or chalk paint.

The candle arrangement  is on the dining table, but it can easily be moved to your coffee table when it's time to get the table ready for a dinner.

The Decorated House - Fall Decorating White Pumpkins

For the entry table it was simple to remove all the Halloween related elements and keep everything that felt like Fall. The antique books and rusty lock are a wonderful balance of autumn colors against the shiny silver and the white pumpkins. The pumpkins are a mixed of painted, mercury glass, and velvet ones,  giving you a nice range of textures to add more interest.

Click the links below to view
and

See Y'All Soon~

Thursday, September 22, 2016

Saturday, November 21, 2015

Happy Thanksgiving!

The Decorated House - Fall and Thanksgiving Entry Table with Velvet and Painted Pumpkins

One last hurrah for the pumpkins before they are put away for another year. It's easy to 
hang on to  Fall when the weather is so nice. If there were a couple of inches of snow, 
do you feel like Fall or  more like Winter? We are expecting a gentle cool down, so that 
will be really enjoyable for Thanksgiving day and I'm looking forward to it!

Since everything begins to move at warp speed from now until the new year, 
I am wishing you a very peaceful and beautiful Season of Thanksgiving. 

Happy ThanksGiving!

See Y'All Soon~

Saturday, October 31, 2015

Happy Halloween! from The Decorated House

Halloween at The Decorated House. Elegant black and white decorating with mercury glass and silver.

Wishing You a Happy Halloween Weekend!
See Y'All Soon~

Monday, October 26, 2015

Halloween Entry Table ~ Black and White Decor

Elegant Black and White Halloween Decor ll The Decorated House Blog

The Snickers and other chocolate bars are ready for the big night,  and the crows are still in a party mood and ready as well.  I remember one year trying to chose some kind of healthier snack for trick or treat, and the kids look at me like I was from another planet. Probably boxed raisins or something like that. Not what the little monsters wanted on Halloween that was for sure. Of course I have really fond memories of the candy we used to haul home when we were kids. I seldom had candy at home during the rest of the year, so it was tough not to be selfish and hide your own stash from other siblings. Today, maybe one little snickers, and that will take care of it for me. But I can't keep them in the house or one might not settle the craving.

I use this nice size urn all year long. For now it supports 3 pumpkins in a topiary style. Since I have so little color in any of the decorations, I chose to use a more traditional color pumpkin for the center. The table will remain much the same for the rest of Fall except for the obvious Halloween decor. I wanted a little touch of traditional fall color and the pumpkin does that very well, and will be perfect for a Fall looking arrangement. 

See Y'All Soon~

Wednesday, November 19, 2014

~ Decorating for Fall - Autumn with Vintage


No the Keno brothers from Antique Road Show are not looking for this little boot; this is a different kind of treasure. Family "treasure" might be a stretch, but this little copper plated boot - shoe was Sweet Hubby's so it  makes it a little family treasure. His mom kept long after he was grown, and gave it to him several years ago. Most of the time it has been on my desk being used to hold trinkets, paper clips and who knows what since then. At least it has been out and not stuffed in a closet. Since this Fall the decorating is copper and lime green, the search was on for copper. And this little "treasure" was perfect for holding a special pumpkin.

There is always a place in our Fall Decorating for this beautiful hand painted ceramic pumpkin. It has been a part of Fall for so many years, and it is always fun to bring it out.  The copper coffee pot also has been around here for at least 20 plus years. It has been hiding in the garage as I contemplated how much of the old copper stuff to give away. I actually forgot it was still here. Filled with late sumer flowers it adds a nice extra touch of copper. 


Sitting in the little round glass area of the copper shoe  is the smallest of the velvet pumpkins that I made. You can see how I made the pumpkins HERE.  If you are thinking that you would like to make some of these but you just can find any dried real pumpkins stems, then why not make your own? 

I had one pumpkin stem that was my favorite, but it was too large for this little velvet pumpkin, so I made a new stem for it. This one is made of air dry clay. I don't have the package so I'm not sure if it is paper clay. The air dry comes in different types, but I think this kind is the paper. It is very easy to use, and you can keep it from drying out by keeping a damp paper towel in a plastic bag with it.


I haven't used it in almost a year and it was not dried out at all inside the plastic bag. I laid a damp paper towel over it for a few minutes before I began sculpting with it, and if a spot seemed to dry I just dipped my fingers in a little water and applied it to that area. Very easy and fun to play with. 

~ See Y'All Soon ~

Friday, November 7, 2014

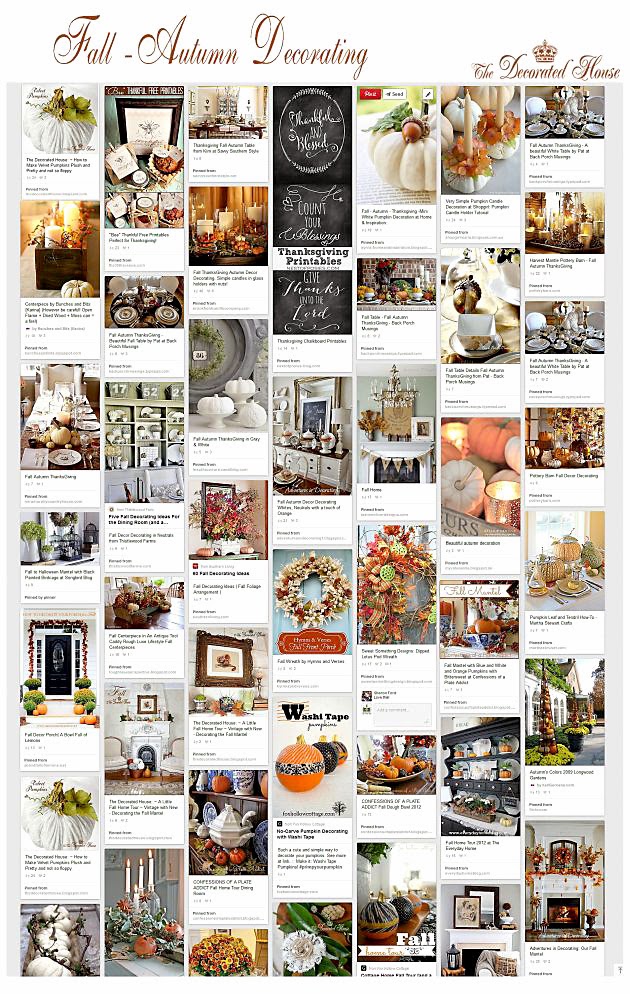
~ 50 + Fabulous Fall - Autumn - ThanksGiving Decor Ideas

http://www.pinterest.com/decoratedhouse/fall-~-autumn-decorating/
Fall and ThanksGiving Decorating Pins

I hope you enjoy some of the wonderful things I have pinned 
for Fall and ThanksGiving Decorating.
Click on the picture above and you will usually go to 
the source of each picture for more pictures 
and sometimes tutorials and downloads.
Happy Weekend ~ See Y'All Soon

Friday, September 19, 2014

~ Velvet Pumpkins for Fall Decorating

The Decorated House - Fall Decorating - How to Make Beautiful Plush Velvet Pumpkins

It's beginning to feel like Fall in many parts of the country, and it sure seems to bring out
that desire to fluff the nest and make a few pretty things to decorate our homes with.
One of those absolutely lovely things is plush velvet pumpkins. Of course
 you can purchase some pretty ones if you are short on time,
but you can also make one, or a few, with some simple instructions. 
Click this link for full directions on how to make beautiful plush pumpkins
 to add to your home this year.


See Y'all Soon~
 ................................................................................
Click on any of the pictures below to shop  art from The Decorated House 

Thursday, September 11, 2014

~ Magnolia Leaves & Burlap Flowers - Fall Decor ~ Natural Elements

The Decorated House ~ Fall Decorating Burlap Flowers and Nature
 Magnolia Leaf Wreath 
and Burlap Ribbon Rosette w/Lace

Magnolias leaves, one of Mother Nature's best inventions are such a perfect natural element in Fall decorating with their beautiful shiny green leaves accented with rich velvet copper on the underside. This is my inspiration for Fall decor this year.  No wonder people have been decorating with them for so many years. And now it's Fall...well kind of. It's still quite warm, but you can fell the change in the gentle breeze during a morning walk. From now through the holidays the magnolias have wonderful seed pods in addition to the pretty leaves, and that makes them so perfect for decorating.

The Decorated House ~ Fall Decorating - Burlap Flowers and Nature

So while we were out walking the last few mornings  we also collected some natural elements to add to our home for Fall. I can remember when we were first starting out Sweet Hubby used to go out on bike rides and bring me back bags of weeds, flowers and pods to use for arrangements. This year I decided it would actually be fun to do much the same thing, and to  mix it up with a few things that I already have or a few things to buy, like this darling burlap ribbon with white dots!

This is another take on the fabric flower rosette that you all like so much.  You can find the directions of how to make it HERE. This time I used a burlap ribbon. So there is no need for you to cut fabric into strips, the ribbon is ready to go. It's the same technique, roll the middle bud, then fold the ribbon away from you and roll it around the bud, fold backwards and roll...and just keep going until it is the size you want. Add a drop of hot glue or stitch it to keep the rose in shape. 

I'm loving the copper and lime green this year. Perfect Fall colors for me. And then Halloween just around the corner. The last days of each year go so quickly don't they?!

See Y'All Soon~


Monday, November 11, 2013

~ White Pumpkins - Soft & Light Fall Decorating

The Decorated House ~ White Pumpkins Decorating for Thanksgiving

Happy ThanksGiving!


 White Pumpkins for Fall Decorating

The objective was to use as much of the elements of the Halloween
decor for Fall decorating as possible. So all the things associated
 with just Halloween were put away, but anything that could still
be used for Fall is still here of course.
The Mercury glass and silver are still hard at work 
showing off the white pumpkins in a
 very simple and soft arrangement.

The soft white velvet pumpkins
and painted pumpkins,
 using Annie Sloan Chalk Paint
in Old White & Pure White.

The Decorated House ~ White Pumpkins Decorating for Thanksgiving
Autumn leaves and a rusty antique key along with the antique
books give a sweet nod to the season of beautiful warm colors.

A velvet pumpkin is adorned with a vintage rhinestone brooch,
and sits in a vintage silver sugar bowl
on top of antique books 
The old skeleton keys make appearance
throughout the year as well.

~ See Y'All Soon ~

Thursday, September 26, 2013

~ A Little Fall Home Tour ~ Vintage with New - Decorating the Fall Mantel

 
Fall Mantel 2013

Fall is in the air, even way down in the South. We too are being coaxed to embrace the new season, ever so gently as each morning is a bit cooler,  just a little bit.  

The Fall Mantel reflects our Autumn. The large sycamore leaves are just starting to turn and lots of green ones are already covering the ground. Shades of rust are still mixed with the beauty of green, and yellow is showing off,  too.

It seems like just about everyone is eager to see Fall this time of year. The days are shorter,  but the evenings are cooler and the promise of stunning colors of leaves and sunsets woo us into the new season. I am no different except I walk slowly into this time of year relishing the last days for summer, and the evening walks with the sun still shining.  But Fall is one of my most favorite times as well. 


 Several years ago, an artist created 2 custom paintings for me, this one with the terracotta pot and chipmunk (I'm not a farm girl if I have my critter wrong) and another one with a pretty baby blue bird. He asked what animals and colors and I wanted and this is what he painted. They were perfect for the way I decorated years ago. Sometimes when you put something away for a while, it is extra special all over again when you find it. And so it is with this delightful painting. 

The mantel is a charming mix of vintage and new. New leaves, both real and faux, playfully accent the fabulous handmade pottery pieces, vintage green pottery, silver and antique books. The peachy colored gourds were painted with Annie Sloan Chalk Paint and other acrylics last year. The colors are still perfect for my fall decor. 

Bowing to the beauty of nature, there is a real bird's nest in the center with the original white cottony type element that the bird used to build it. This was a rescued, abandoned nest we found several years ago and which I use very often just because I love it so  much .


This vase is the last piece we collected. The sister vase to this one was purchased more than 20 years earlier. When we found the same artist at a large art show, we fell in love with this lidded vase and added it to our art pieces. At that time I was using a lot of brown as an accent color. Bringing it out to a new setting and time  makes it special to us all over again.  Here is is shown with vintage silver and milk glass, and ASCP painted  pottery gourd,  a moss ball and some sycamore leaves.


Thanks for stopping by and sharing some Fall decorating with me.
I have a few more Fall decor pictures, so come by again.

See Y'All Soon~

Wednesday, September 28, 2011

~ Fall Mantel Decorating at The Decorated House


Even way down south, we will soon be thinking about cooler weather and enjoying time inside. Not quite yet, it's still very warm. So decorating for Fall helps get you in the mood for when the sweaters are needed.


The Mercury glass pumpkins reflect light and add a delightful sparkle to the Fall mantel. I also added some vintage silver pieces and one real mini white pumpkin along with two lightly colored gourds. The shapes of the gourds mimic the tall Mercury glass one that is part of the pumpkin trio.


One vintage sliver tray, one real mini white pumpkin/gourd, an almost rusty Fleur De Lis, and a wonderful rustic fall colored gourd. Shapes, colors and textures all playing so nicely together.


The Mercury glass also is the perfect complement to the silver and glass vase, now topped with another Fall colored gourd.


I am eager to get around and see all the Fall decorating in BlogLand.

See Y'All Soon
~ Donna