Showing posts with label * DECORATING THE HOME. Show all posts

Sunday, July 15, 2018

How To Create a Beautiful Aged Turquoise Patina - "Secret" Tutorial - French Drawer Pulls - DIY Tutorial


DIY How to Create a Beautiful Aged Turquoise Patina - The Decorated House 
How to create this beautiful patina for 
French Drawer Pulls 
or any other thing you might want to paint!
........................
The "secret" is how  darn easy this is! I certainly hope it didn't sound like the painting of the drawer pulls was some difficult or complicated secret. It certainly isn't. It's quite simple.  Don't worry about changing it to suit your needs, go right ahead, it is very adaptable. Over the years, this has been one of the most asked questions, how to create this look. So here are the directions!

Thursday, September 22, 2016

Thursday, September 15, 2016

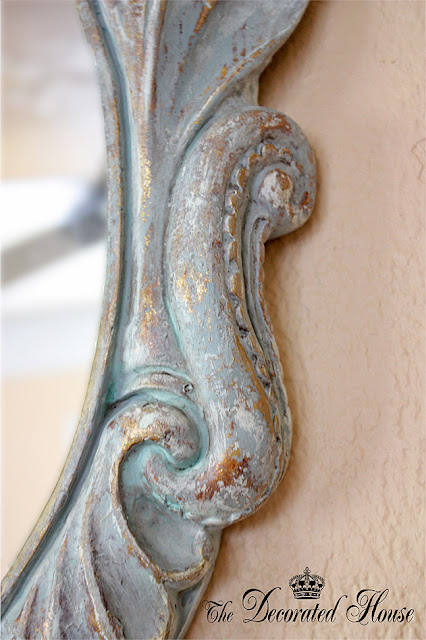
~ How To : Antique Glaze and Wet Distressing - A Perfectly Imperfect Frame with Annie Sloan Paris Grey Chalk Paint

The Decorated House :: How to Glaze and Distress Chalk Paint
Fall is my favorite time to fluff the nest! The shorter days means less daylight to work on projects, the cooler temperatures sure help. So let's get painting!

I'm sure the shop owners shop owners and workers were laughing as we walked out the door with the old frames. The frames looked really bad and didn't give much hope of looking better any time soon. The sellers must have thought what a stroke of luck to find anyone who would actually pay money for that old junk. But their junk was a perfect find for me.

This one was actually in two pieces. The inside needed to be reattached to the outside molding. And some of the original carving was missing. It was certainly past its prime in life. It made me so want to make it look good again. Here's how work with different colors and using a wet distressing technique.

Friday, June 24, 2016

~ Get This Look For Less


What an inviting room! It doesn't look like a room where a couple of kids play, but it could easily be so with the addition of some storage for toys.  Although it appears to be missing a TV,  they tucked a not too large one inside the armoire. 

This room would be extremely easy for you to get the look. 
Only element could prove a bit difficult and that would be the antique cane back sofa. But there are many other options you could choose. 

This home was featured by Country Living and is the creation of Emily and Michael Knotts of NC.  They fully utilized trips to garage or tag sale, on line thrift find sites, and the good ol' big box hardware store.

 Some of the details in the Living Room

Curtains: Love the simple window treatments  that Emily sewed herself of $9 a yard  cotton to mimic the more look of a more expensive linen. It is a sheer cotton, that is most likely at least twice the width of the windows for fullness. The biggest mistake that I see when people use a cheaper fabric is that the still skimp on the amount of fabric they use. This makes cheap fabric look simple cheap. To get to a more chic look use more yardage, more width and get a fuller look so it doesn't look like you tossed a drop cloth up there. 
 
Sofa:  The 1920s cane sofa  was a  steal at $250  from Craigslist. I've never had that kind of luck to find one in such good condition for that price. She recovered it in a drop cloth, which is perfect for washing or recycling a few years down the road if kids and pups give it a bit too much wear.


White Chair:  Thrift store find. You probably recognized it as from Ikea. This I would just purchase new since it is an upholstered piece because of dust mites etc. I know lots of people are perfectly find with buying it used. However it isn't expensive to begin with. Also if you would like a much better chair that this, and you do find a resell one, you can have it reupholstered for a much longer lasting addition to your decor.


Wingback Chair: GoodWill find redone in a drop cloth. Same as the white chair, you could totally reupholster one you find at a thrift store. It is also a good idea to check upscale consignment shops,
A lot less likely to have any unwanted passengers in the fabric or upholstery.

Ladder, $5: Emily's go-to vintage source, Cline's Country Antiques near Charlotte, harbored this ladder. (clinesantiquesmpnc.com)


Lighting, $24: A $4 socket plus a $20 garden lantern equals a pendant lamp with organic appeal. (Socket; ikea.com. Similar bamboo lantern, $89.99; nova68.com)
Wardrobe, $100: This $60 wardrobe from Cline's, fronted with two $20 custom-cut Lowe's mirrors, hides the Knottses' TV. (lowes.com)
Carpet, $150: Emily bought this sea-grass rug at Hall's Flooring in Charlotte. (hallsflooring.com)
Wooden crate, $3: Another Cline's discovery, this fruit crate holds antique glass fishing floats.


Reading Nook

Wall art, $30: Emily won this 1909 pull-down map on eBay.
Chair, $60: This secondhand chair and footstool from Goodwill currently go for $349.99 total at Ikea, new.
Shelving, $4: A pair of $2 brackets convert free driftwood into a floating shelf. "Sea glass, spring branches, and driftwood bring beauty into your home—for free," Emily advises. (lowes.com)

Monday, June 6, 2016

~ How To Make a 5 Minute Pillow ... Maybe 10 Mins.

The Decorated House - How to Make a 5 min. Pillow Cover

You can make a pillow like this in 5 minutes!
(Or maybe 10 if you are like me with sewing.)
Tutorial and Step by Step Directions:
-------------------
Click on "Continue Reading" Link Below for the Instructions:

Sunday, August 30, 2015

~ Green Envy - Only the Pretty Kind


By the date on the calendar, it will be Fall soon enough. But here it is still in the nineties and only a few flowers make it through so many days of this heat. Even the zinnias are coming to the end of the their summer season. Each year I love zinnias more and more. 

And this is one of my all time favorites. Green Envy!

Friday, August 7, 2015

~ How-to Create an Antiqued Silver Paint Finish. Diy. Tutorial


The Decorated House - DIY an Antiqued Sliver Paint Finish

It's funny how you really never know how some little gift you give will be something the person will treasure for a long time. Nor do we ever know how quick something that was more costly to purchase ends up at the GoodWill or a charity like it.  But it's the thought behind the gift that counts, right? After that you just have to let it go even if you worked hard or spent generously, if it just wasn't something the receiver wanted, you did give from your heart.
CLICK ON CONTINUE READING FOR INSTRUCTIONS: 

Thursday, July 23, 2015

~ Is Annie Sloan Chalk Paint Worth The Price? And A Few More Tips

The Decorated House ~ Is Annie Sloan Chalk Paint Worth the Price?

As you check out blogs and see some fabulous makeovers using chalk paint you could be thinking that you might give this ol' chalk paint stuff a whirl. Then you see the price, especially if you have to pay shipping! It's expensive enough if you can find a local source, but by the time you add shipping it is really expensive. I've been using it for a few years now, and my thoughts on it haven't changed.

** Please note if you are not familiar with these paints, it is NOT "chalkboard" paint that you buy at the craft store. Although they now sell a folkart version of chalk paint which you might like to try if you use a 40% off coupon. But it is not the same "recipe" for chalk paint as the ASCP.

The Decorated House - Annie Sloan Chalk Paint, Worth the Price?Here are answers to some of your questions you have asked me:

Saturday, July 18, 2015

~ How to Create a Beautiful Antique Look with Annie Sloan Chalk Paint ~ Blues - Wet Distressed & Waxed


The Decorated House ~ Create a Beautiful Blue Distressed Antiqued Finish with Annie Sloan Chalk Paint
There's a lot more to these chalk paints then just painting a quick coat of paint and doing a little sanding! Sometime ago I read Annie Sloan discussing working with her chalk paints and waxes to get different looks. So this was an experiment to see how to make a beautiful more aged look.  The finished look is really worth the work. (Click on Continue Reading Link Below for more Information.)

Thursday, June 25, 2015

~ French Chair Makeover : Distressed French Blue : Wet Distressing with Annie Sloan Chalk Paint

The Decorated House - Tutorial Annie Sloan Chalk Paint on French Chair
Oh no! I am longing for a nice, not too rustic, distressed chair. Oh well,
sometimes we just have a need for a little change. And since it is only paint, we can
certainlyrepaint a chair  ... once or twice or maybe 20 times!
Not this chair, but maybe a couple others are about to get a simple, new look.
.......................................

Looking for a really rustic, distressed French Blue look? Try this method.

Click on "Continue Reading" Link Below for the Instructions:

Thursday, April 23, 2015

~ How to Print on Fabric Using an Inkjet Printer - Image Transfer - DIY - Tutorial


The Decorated House: ~ How to Print on Fabric - DIY - Tutorial - Inkjet Printer Image Transfer


So why are we using the shipping label?
Good question, and if I don't answer that first 
this could be confusing! 

You can't print on fabric from you printer because the fabric is 
so flimsy. It will jam in the printer for sure.
So you are using the label to make it possible 
to get the fabric through the printer. 

All backing and paper will be removed
after you are done printing and
you will have lovely piece of art
printed on fabric!!
 ____________________________________________


Forget the spay glue adhesive and freezer paper. This is much better.
It is very easy to do and requires no messy chemicals to transfer your image to fabric. 
This tutorial will show you how to use your inkjet printer at home.
(I have read that others used their laser printers for fabric,
but I have not tried it, so I cannot say how it works from my
own experience.)

** All art in this tutorial is the original, copyrighted
art of Donna, The Decorated House. **

Click on "Continue Reading" Link Below for the Instructions:

Wednesday, November 19, 2014

~ Decorating for Fall - Autumn with Vintage


No the Keno brothers from Antique Road Show are not looking for this little boot; this is a different kind of treasure. Family "treasure" might be a stretch, but this little copper plated boot - shoe was Sweet Hubby's so it  makes it a little family treasure. His mom kept long after he was grown, and gave it to him several years ago. Most of the time it has been on my desk being used to hold trinkets, paper clips and who knows what since then. At least it has been out and not stuffed in a closet. Since this Fall the decorating is copper and lime green, the search was on for copper. And this little "treasure" was perfect for holding a special pumpkin.

There is always a place in our Fall Decorating for this beautiful hand painted ceramic pumpkin. It has been a part of Fall for so many years, and it is always fun to bring it out.  The copper coffee pot also has been around here for at least 20 plus years. It has been hiding in the garage as I contemplated how much of the old copper stuff to give away. I actually forgot it was still here. Filled with late sumer flowers it adds a nice extra touch of copper. 


Sitting in the little round glass area of the copper shoe  is the smallest of the velvet pumpkins that I made. You can see how I made the pumpkins HERE.  If you are thinking that you would like to make some of these but you just can find any dried real pumpkins stems, then why not make your own? 

I had one pumpkin stem that was my favorite, but it was too large for this little velvet pumpkin, so I made a new stem for it. This one is made of air dry clay. I don't have the package so I'm not sure if it is paper clay. The air dry comes in different types, but I think this kind is the paper. It is very easy to use, and you can keep it from drying out by keeping a damp paper towel in a plastic bag with it.


I haven't used it in almost a year and it was not dried out at all inside the plastic bag. I laid a damp paper towel over it for a few minutes before I began sculpting with it, and if a spot seemed to dry I just dipped my fingers in a little water and applied it to that area. Very easy and fun to play with. 

~ See Y'All Soon ~

Thursday, September 11, 2014

~ Magnolia Leaves & Burlap Flowers - Fall Decor ~ Natural Elements

The Decorated House ~ Fall Decorating Burlap Flowers and Nature
 Magnolia Leaf Wreath 
and Burlap Ribbon Rosette w/Lace

Magnolias leaves, one of Mother Nature's best inventions are such a perfect natural element in Fall decorating with their beautiful shiny green leaves accented with rich velvet copper on the underside. This is my inspiration for Fall decor this year.  No wonder people have been decorating with them for so many years. And now it's Fall...well kind of. It's still quite warm, but you can fell the change in the gentle breeze during a morning walk. From now through the holidays the magnolias have wonderful seed pods in addition to the pretty leaves, and that makes them so perfect for decorating.

The Decorated House ~ Fall Decorating - Burlap Flowers and Nature

So while we were out walking the last few mornings  we also collected some natural elements to add to our home for Fall. I can remember when we were first starting out Sweet Hubby used to go out on bike rides and bring me back bags of weeds, flowers and pods to use for arrangements. This year I decided it would actually be fun to do much the same thing, and to  mix it up with a few things that I already have or a few things to buy, like this darling burlap ribbon with white dots!

This is another take on the fabric flower rosette that you all like so much.  You can find the directions of how to make it HERE. This time I used a burlap ribbon. So there is no need for you to cut fabric into strips, the ribbon is ready to go. It's the same technique, roll the middle bud, then fold the ribbon away from you and roll it around the bud, fold backwards and roll...and just keep going until it is the size you want. Add a drop of hot glue or stitch it to keep the rose in shape. 

I'm loving the copper and lime green this year. Perfect Fall colors for me. And then Halloween just around the corner. The last days of each year go so quickly don't they?!

See Y'All Soon~


Saturday, August 2, 2014

~ Decorating with Shells - Gifts from the Sea

 The Decorated House ~ Decorating with Shells - Vintage Blue Bottle - Starfish

Living Room Mantel 
Moss Ball in Vintage Milk Glass Urn
Starfish, Shells and Antique Blue Bottle
Living in a sub-tropical beachy location for almost my entire life means that shells bring back lots of memories.

Saturday, March 29, 2014

~ Decorating for Easter


The Decorated House. Decorating for Easter. Moss Ball, Cement Bunny, Antique Vellum Book
It's time for Easter decorating this weekend, I hope! Here are a couple of pictures from a couple of years ago. One of the best things about blogging is that you can go back and see images from other years. I totally forgot about that cute garden bunny. Wonder where he is? He might hop back inside again this year.
-------------------------
The bunnies are running wild in the house this year. Even this little old garden bunny is inside. I think he has been somewhere on the porch for couple of years, although he was an outside bunny once upon a time. He is sitting beside a reindeer moss ball in a slightly tarnished bowl. Together they are perched atop a beautiful antique Italian vellum book from 3 Fine Grains.

Thanks for the nice comments on the last post, but I deleted the whole thing due to an overactive spamming party over the weekend. Thank goodness blogger has that spam filter now. I've included the same picture below that was in that post. An open shelf cupboard with drawers in the kitchen. It won't be there forever since open shelves are too much work to keep clean for me.

The Decorated House - Kitchen White Dishes - Small Space Storage

This coming week I'll add a few more pictures of Easter decorating around the house.
Thank you for stopping by!

Have a Great Weekend 
See Y'All Soon~

Monday, March 24, 2014

~ Milk Glass & Succulents and a Little Green for Spring

The Decorated House : Decorating with Milk Glass & Succulents

The Spring Equinox! It always brings out that longing for the green of Spring and Summer. The heat will be here soon enough, so I'm not trying to rush Summer. It does however make me want to bring more green inside for a little while.
Milk glass is one of those old fashioned goodies that I wish I had seen the beauty of years ago.  But in the past, there was so much of it at the thrift shops, it made it seem just to grandma-like for my taste. Whatever pieces I used to have were long ago given to the Goodwill. In the last few years however I have picked up some here and there if it had really nice lines. Today, you can think of so many ways to incorporate this simple and beautiful white glass into your style even if you haven't quite embraced the grandma style. The lines of the ruffled pieces are so beautiful.

I'm still experimenting with succulents inside the house. They are so extremely easy to grow outdoors, but are a bit more difficult to grow indoors. The ones on the chest right by the window are doing very well. This one  is sitting on the coffee table further away from direct window light. So we will see how it does with less light that the other plants get. For many years I always had house plants, and just got away from tending them because there was plenty of work to keeping the ones outside alive and well.  Now it's one of those things that I miss having so I'm looking for some easy to keep green lovelies this year. 

The Decorated House :: Decorating With Milk Glass & Succulents

Also some green pillows are on the sofa at the moment. What is easier that changing out pillows with the seasons! Since pillow covers are so inexpensive and easy to make, just this simple change can keep your interiors looking fresh to you. 

Again after ignoring milk glass for a while, I fell in love these ruffled bowls. Instead of too old fashioned, they actually look quite modern to me.  They remind me of some of today's lovely blown glass art pieces.

The Decorated House : Milk Glass & Succulents

I'll let you know how all these succulents do inside. They may need a bit more attention than I seem to give indoor plants. I also brought in some bromeliads from the gardens, after washing them very well, which are doing fabulous. They are air plants after all, so other than giving them too much attention, they should be very easy to keep inside.  So far all I did to them is stick them in a container, pretty them up with a bit of moss, and remember to water  the little "cup" in the center before it gets dry. Now anyone can do that!

See Y'All Soon~

Thursday, August 22, 2013

~ Small Kitchen Storage


Where to put those small kitchen appliances??

Work in the kitchen is continuing. It is taking a great deal more time than I had planned. Maybe it began with the slightly crooked drawer which was a learning experience to figure out how to make it perfectly straight. Or it might have been the desire to have more pull out baskets in the cabinets and to make them all match. It's hard to remember what started this latest episode of the kitchen redoing. The more work I've done, the more it seems it might have been easier to have just torn the place up and cabinets installed. I just didn't want the kitchen so torn up that I couldn't cook for more than 24 hours. I love to cook, and eat!


After all the work, I'm not even sure too many people would notice there is a difference! A lot of work has been on the inside, reworking the limited cabinet spaces with more pull out wire baskets, adding more turn tables, painting the insides as needed and just trying to get more organized and less cluttered.

When the new refrigerator came a few years ago, it turned out to be less than 1/4 inch too wide to fit in the space intended for it. So we brought in this white "hutch" that was once used in the living room in it's original natural wood finish, and years before that it held a TV. Yes, televisions used to be smaller!  It had been painted white at some point in time, but need repainting to match the other white in the kitchen.  It certainly filled up quickly with things from the kitchen. And since I have almost no drawers in this room, having 3 nice size drawers was very welcomed.

When I was tired of getting the big mixer out of a lower cupboard one more time, it was moved here where we kept other small appliances that we use on an almost daily basis. Instead of worrying about having these things out in plain site, I'm going to just embrace the convenience and the pretty lines of these work horses in the kitchen.

~ See Y'All Soon ~

Thursday, July 18, 2013

~ How to Make a Pottery Barn Style Monogram Pillow, DIY


This is where I used one of the last flowers I showed you how to make. It adds a lovely touch to the Pottery Barn style pillow. How to make the fabric flowers can be found here and here and here and here.

The pillow here is a simple envelope closure style pillow cover. I have written a tutorial on it here

1. Choose a simple flat weave fabric like a cotton or linen for this project. My pillow is made with a    medium weight cotton. You can use a linen or cotton or blend or any plain fabric you like.

2. Find a font that you think would look good as your monogram, but also one that will be easy to cut out.  Play with the size of the capitalized letter to see who large you need for your pillow or project. Just print it out in draft mode to save ink, cut it out and see how the size works for you. 

3. Print out your letter on plain paper. Then cut the letter out exactly how you want the monogram to look on the pillow. 

4. Lay the cut out letter on top of a piece of felt. If using white felt as I did here, use a pencil and lightly trace around the letter remembering the inside parts as well that need to be cut out. 
If you are using a dark felt, you can just a piece of chalk to trace the letter. 

If you use felt, there is no need to hem or fix the edges. When using a different fabric you will need to hem it, or use a no fray liquid on it.

5. Attach the letter/monogram to your pillow with fabric glue or by lightly sewing it on.

Then if you wish, you can either embellish at little like adding the fabric flower or just leaving it with the monogram alone. 


See Y'All Soon~

Friday, July 12, 2013

~ Queen Bee Digital Art in the Shop! With BeeHive & Paris


Queen Bee Art with Paris, Crown and BeeHive

There is a new Queen Bee Digital Download in the shop.
Thank you to the nice people who
have asked for it.

Hope you all have a 
Wonderful Weekend!
See Y'All Soon~